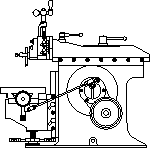
This month’s story is one of acquisition and rebuild. Terry Chisholm from McGregor Ontario submitted this story about his 7-inch AMMCO.
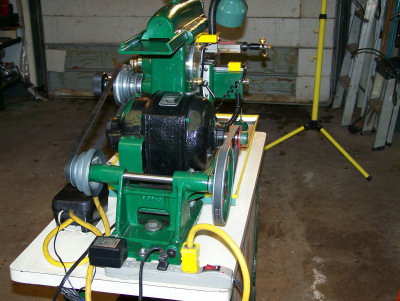
7 Inch AMMCO
Photo by Terry Chisholm
“I obtained this shaper from my friend Keith (who is a farmer) about Jan 2003. He had it about a year. He obtained it for the 1/3 hp motor on it. He wanted to use it on a grinder, I asked him where he got it from, and he stated that another fellow that he knew had it. It had belonged to his brother and was stored in his barn for some time - at least ten years. I told him that I would trade him a ½ hp motor for it and he agreed to the terms.
Keith’s son and I loaded it up in the trunk of my car and I took it home. I unloaded it with my engine lift. I would say it’s about 250 lbs.
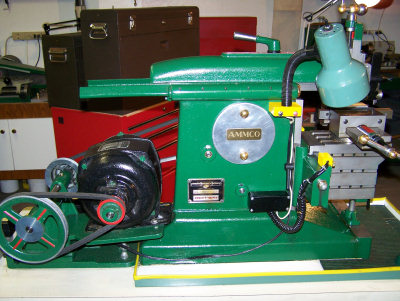
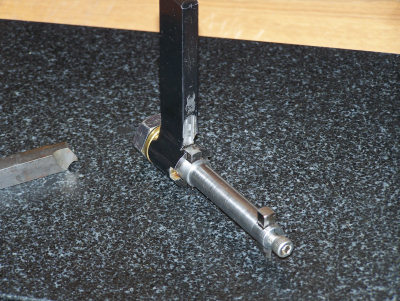
Right Side
Photo by Terry Chisholm
The shaper was a cruddy mess - oily, dirty, paint chipped and worn. It was grey and I believe that was the original color. I did not take any pictures before I started the clean up. It had a war tag on it so the vintage is late 30 or early 40s.
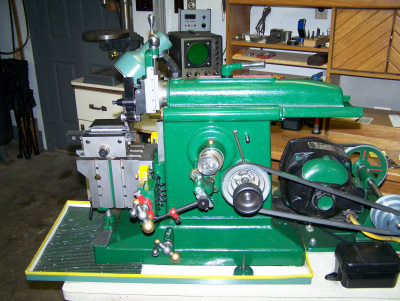
Right Side #2
Photo by Terry Chisholm
I finished rebuilding and painting it after a few months of part time work. My first task was to strip and clean it, next haul it to where I worked and then glass bead blast all parts. Then I cleaned it again and started making new bushings for it. I replaced the bull gear shaft bushings, spur gear shaft bushings, put new bushing and pins on the link arm, and drilled out and made new bushings for the ratchet links. All bushing were made from bronze. I also made a new slide block for the stoke adjustment.
I first put on two coats of primer. Then I brush painted it with two coats of forest green enamel.
Rear
Photo by Terry Chisholm
I had some parts black oxide finished and did a lot of polishing with a cotton buffing wheel charged with rouge. I cleaned up the vise on a surface grinder. I polished the vice handle with jewelry rouge and cotton buff. I turned the balls for the vice handles from brass.
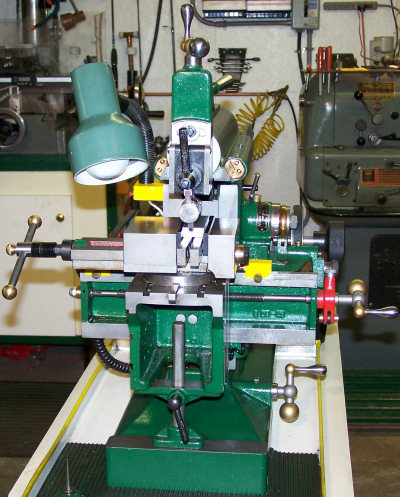
Front
Photo by Terry Chisholm
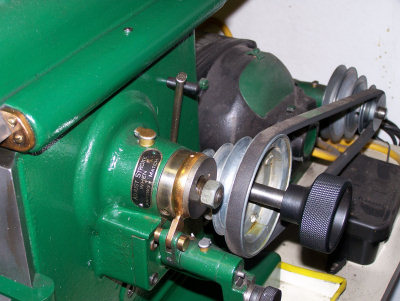
After I had it cleaned and painted, I let it set for a week to harden up then I took off the drive pulleys, mounted them in my lathe, cleaned them, installed new belts and mounted it on a bench that I had in shop. When I fired the old girl up, low and behold, she ran very quietly.
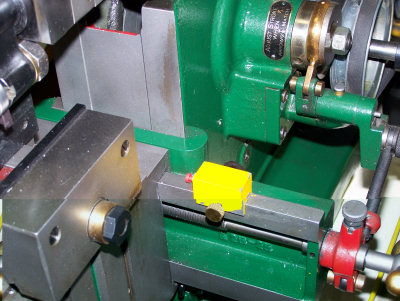
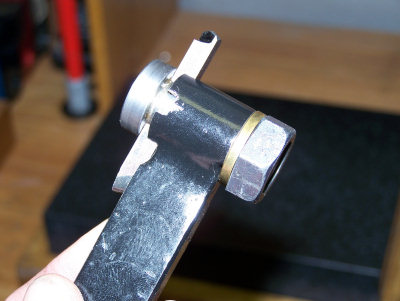
Limit Switch
(Yellow)
Photo by Terry Chisholm
The motor is a 1/3 horsepower Leeland which I believe is the original.
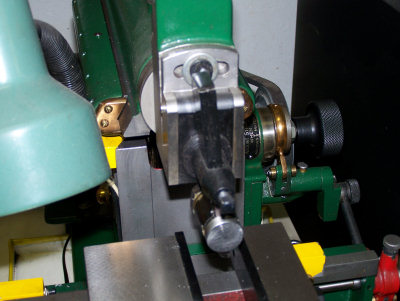
Clapper & Tool
Holder
Photo by Terry Chisholm
After a few test cuts, I thought that I had better find a way to shut it down on auto, so I made micro switch holders and wired it to shut down when it was finished cutting. I made two slide brackets for table travel limit switches (momentary, normally closed switches) and a holder for the start & stop switches out of 6061 aluminum. The start switch is normal open, the stop switch is normal closed. On the right rear of the shaper table top, there is a black enclosure that contains a 12volt relay (single throw double contact). This is powered by a 12VDC adapter, so there is no high voltage at the controls. If the power drops out, the relays drop out and the motor also shuts off.
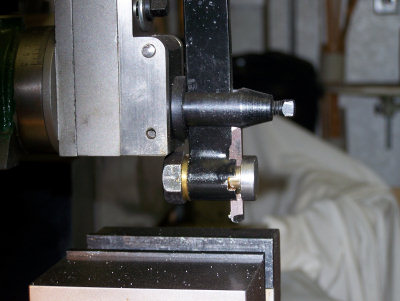
Tool Holder
Photo by Terry Chisholm
The yellow aluminum blocks on each side of table are positioned and mounting micro switches. When the carriage reaches the micro switches it will shut the unit down.
Cutter Holder &
Insert
Photo by Terry Chisholm
The larger yellow aluminum block on the left that mounts the light also has a stop switch and a start switch. I can jog the motor by holding down the stop button and depressing the start button!
[Note: This is the same functionally as the limit switch schematic that Bob Neidorff has given us in shaper column 55.]
I also made the light holder from 6061 aluminum.
The door was missing so I turned one out of 6061 aluminum and made locking arms and brass knobs for it.
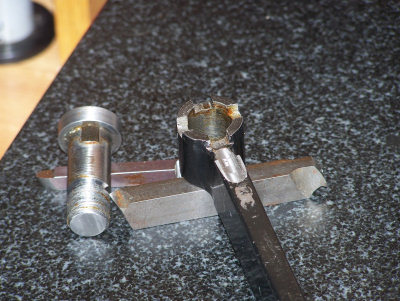
Then I made the tool holder that was designed by Art Voltz. I milled it out of a solid piece of bar and welded on the round end. I bored out slots to hold the cutting tool in two positions – for cutting on the horizontal or vertical. The insert was broached through to hold cutters.
Sheering Tool in
Holder
Photo by Terry Chisholm
[Art’s tool holder drawings are posted on the web at the Yahoo Metal_Shapers group:
http://groups.yahoo.com/group/Metal_Shapers
The drawings are in the Files section (membership required) as holder1.jpg and holder2.jpg]
For cutting keyway slots I made a special insert.
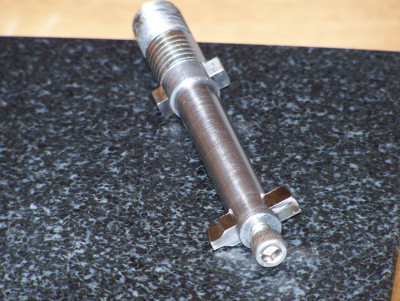
Keyway Insert
Photo by Terry Chisholm
I have used the shaper to square up stock, cut internal keyways, and most recently, cut a real small dovetail for an indicator holder.
The total cost in this project is small because I had most of the material in shop. I bought two belts and a couple of cans of primer. I had the bronze for bushing in stock and micro switches and relays from my amateur radio building hobby.”
Holder & Keyway
Cutter
Photo by Terry Chisholm
Thanks Terry for that great acquisition story.
Keep sending me email with questions and interesting shaper stories.
My email address is KayPatFisher@gmail.com.