Simple Grinder
Photo by Siegfried Schmidt
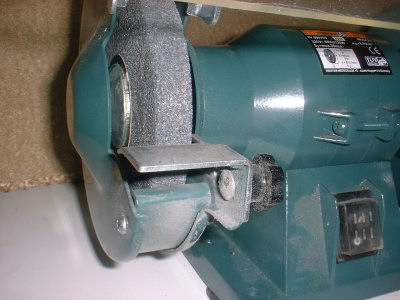
Whenever you reach the stage of grinding thread or cut off tools, an adjustable grinding rest that gives a stable position is necessary. Since the grinding rest from the machine is of simple sheet metal that bows wherever the wind blows, it excludes itself as a place to attach an angled guide.
The first measure is to add a stable base. A few pieces of angle iron, welded together to support a small worktable that is linked to the grinders base helps a lot. To this small table, angled guides for the tools are fastened down. Here, the side angle is chosen via exchange of the tool rest.
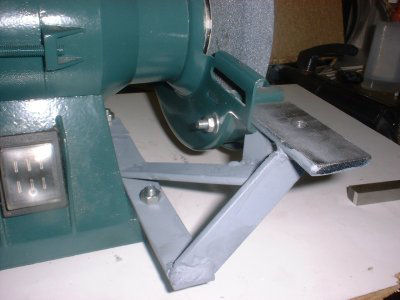
Grinding Rest
Photo by Siegfried Schmidt
In the next picture, you see a rest made of two angled aluminum profiles. They can be turned and set to any height. Also, the two angles can be set to a third angle via a slotted hole.
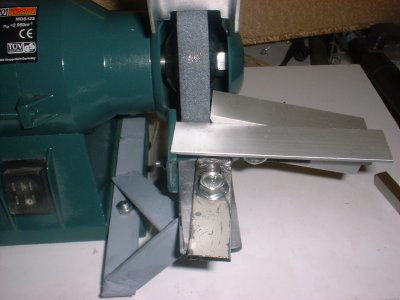
Aluminum Profiles
Photo by Siegfried Schmidt
With this rest, reproducible angles are easily obtained. For fast setup, a few triangles are milled out of plastic to be used as set up jig.
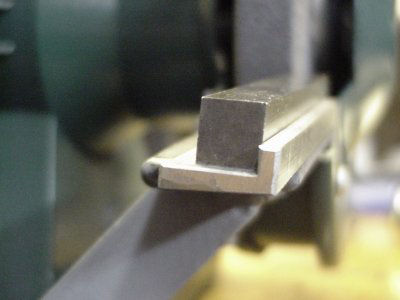
Grinding Angle
Photo by Siegfried Schmidt
Tool rests with a set angle are very handy. In the picture, 3° is used. It’s easier to grind when the angles are fixed automatically. It’s worth the effort to grind a few for the most often used angles. This is best done in pairs. Then it’s possible to hold the tool down with a clamp while grinding the angle.
The grinding rest has proven very useful up to now but if I were to do it again, I would increase table size drastically.
In the meantime, as I set my mind, I would go for a complete, pivoting table for both discs. A nice mod can be found at Kay Fisher’s shaper column 42 which was printed in the December 2004 Gazette and can be found on-line at:
www.neme-s.org/shapers/columns/shaper_column_42.html
The advantage here is to be able to grind straight angles on the side of the wheel. For more details, read there.
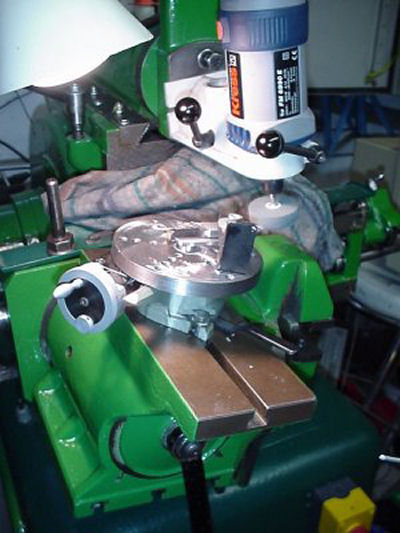
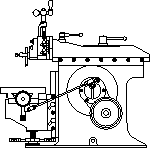
Shaper Grinding
Photo by Siegfried Schmidt
Even tool grinding is possible on the shaper. Cutting forces towards the sides of the work piece are much smaller on a shaper than on a mill, which helps a lot with delicate or hard to grip parts.
Despite all jigs and aids, manual grinding is a matter of practice. To grind angles and flats by machine takes more time and effort, unless you have a machine made for this job.
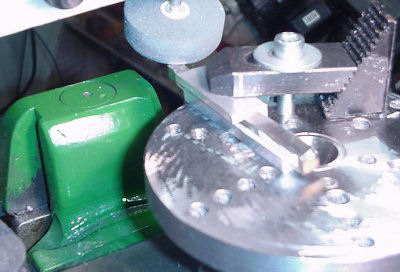
Grinding Close-up
Photo by Siegfried Schmidt
The shaper is ideal for such tasks. The tool head is exchanged for a high-speed grinder and it’s instantly possible to grind planes in any angle.
The machine takes care of the three axes (XYZ) and one angle, the second and the third angle can be set via the dividing head and an angle fixture.
With this equipment, grinding a tool is no hassle. Even form tools are no problem. Grinding takes longer, but heat is drastically reduced.”
Thank you Siegfried for that great story and thank you Andreas for the translation into English.
Keep sending me email with questions and interesting shaper stories.
My email address is KayPatFisher@gmail.com.