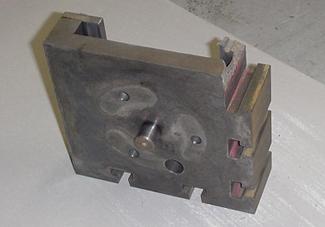
Broken Cross-Slide Photo by Pete Verbree
I really wasn't sure how to proceed at all. I posted a question on the news group "Rec.Crafts.Metalworking" and on the Yahoo shaper discussion group. A couple of replies came back, one suggested welding, and another suggested I ignore the damage. Neither suited me! I was afraid welding might distort the piece. I wasn't about to ignore it, having gone to this extent already.
Time for some contemplation! Over the next week or so I considered my next move. The repair of the cross-slide was mostly cosmetic. It would be mostly to rebuild the broken t-slot and make the machine look like someone cared.
With this in mind I rummaged through the scrap/cutoff box and came up with a small block of cast iron bar stock. I set the cross-slide on the mill table, supported by a large angle plate, and machined away the broken corner, giving straight square surfaces to measure. The corner had broken away at the edge of the t-slot, so I set the iron block in the vise, and machined it to give me the correct overhang for the top of the t-slot plus a little more to align the new piece with an end mill.
Next I machined the slot for the slide way, machining it slightly over size (.002") so I wouldn't have to worry about scraping the sliding surface (I'm a coward.) All of the outer surfaces of the block were left proud of the originals so I could match them when the piece was assembled. I assembled the pieces with 1/4" countersink SHCS and lots of Loctite.
Once again I placed the part on the mill table, taking extra care to get the surfaces exactly straight. I then milled the repair flush to the original surfaces, including the t-slot.
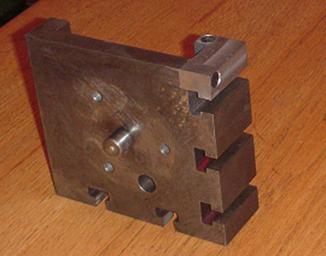
Cross-Slide After Repair Photo by Pete Verbree
The last job on this piece was to drill and tap a new gib screw to replace the one where the original crack had occurred. Lookin Good!
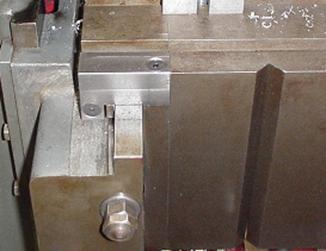
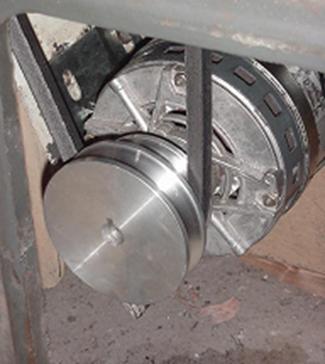
Cross-Slide Mounted Photo by Pete Verbree
After some more reassembly, it was time to turn my attention to finding a motor. According to the data plate, the Alba was originally equipped with a ¾ hp, 960 rpm, 220/440 volt, 3 phase motor. As the motor was missing when I got the machine the use of a converter was out, as was the use of any commonly available utility motors. I again turned to the Rec.Crafts.Metalworking newsgroup for suggestions. Several replied, but most of the ideas were a touch on the expensive side (variable frequency drive, DC motors.) One person suggested that I look for a 1175 rpm motor that are fairly common for fans, although a bit expensive. Now here was a workable idea.
I called around to the local motor suppliers, for a quote; about $350.00 was the reply. Are we seeing a trend here? Once again, I was forced into the scrounge mode!
Early January took me to Toronto on business for two weeks, so in my off time I hunted around. Eureka! A suitable motor was found at "Princess Auto" for $19.00. You got to love surplus stores! This motor was a little odd, having no base, an output shaft about 8" long, 1075 rpm, not reversible (luckily it turns the right way). It is also 220 volts single phase. A base was obtained from a local woodworkers supply, which sells them to adapt motors for grinding wheels.
When I arrived home I started to work on a pulley for the motor installation. This took a little time with a calculator. The machine has two drive ratios, by belt, as well as two speeds changed by gears. This meant that I had to match the dimensions of the pulley in width and get the diameters correct so that belt changing was not a big deal. Frank Dorian had measured his pulley for me, so armed with this info I started to calculate. Based on the size of the big pulley, Frank's dimensions, the original speed and the stroke rate from the manual, I reckoned that the big pulley (input shaft) had to turn at 360 rpm at low speed. After a couple of hours and much scrap paper I figured that the pulley should measure 3.875" and 3.140". I used the info in "Machinery's Handbook" to dimension the pulley grooves.
The pulley itself was a straightforward turning job in the lathe, and I put the keyway in the bore with my Atlas shaper.
New Pulley on Motor Photo by Pete Verbree
More assembly! Fit the motor to its new base, put on my electricians hat and do the wiring, and run to the industrial supplier for a belt.
With the motor now installed it was time for a test run I contained my self enough to carefully oil the machine and turn it over by hand to see that nothing was binding. So far, so good!
I disengaged the clutch and turned on the switch. Makes a whirring noise - Good! With great trepidation, I engaged the clutch. The ram started to slide back and forth! Real good!
I stopped the machine and bolted a piece of scrap to the table. I quickly ground a piece of tool bit and fitted it to the tool holder (which had been donated by Frank Dorian. Thanks Frank!)
Some quick setup of the ram position and stroke and Off We Go! I gingerly feed the tool down and set the cross feed to work.
As I watched the machine feed across I realized that the feed was not ratcheting in the correct timing (feed on the back stroke, ratchet on the push stroke.) A little more watching, and I realized that it was 90° out of phase.
The motor also seemed to be a bit wimpy; it would only cut about .025" deep cut at .005" feed, certainly not in keeping with this category of machine. Back to the Internet and I ask more questions to the groups.
My next outing to the shop was more productive. I took the bull gear apart from it's shaft, indexed it 90°, and reassembled it. I installed a different capacitor on the motor, and adjusted the belt tension. I took care to grind the tool to match the shape recommended in one of my books, and carefully set it in the holder.
Test two produced more encouraging results. I again set the machine going and tried various depths of cut settings. I stopped at .150" at .005" feed, as I didn't want to break anything.
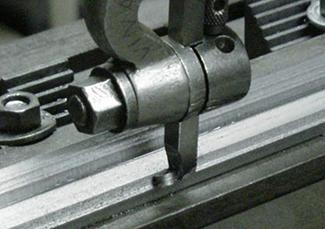
Alba Shaper First Cuts Photo by Pete Verbree
The only deficiency I noted on this run was a clunking noise from the link rod assembly, when a load was applied. Previous experience with my first Atlas shaper told me what this was caused by excess clearance between the sliding block and the slot in the link arm. I measured the clearance again and was startled to find .011", not the .006" that I thought I had. So Alba's first job has been assigned, make another slide block and "Keep The Tolerance Tight"
The machine is quite useable without it, and as I am the only operator of the machine, safety is less of a concern. I decided to delay building one for a while so I can get on with having some fun "Making little pieces out of big pieces".
Readers might also note that I didn't mention painting during this story. My shop is heated by a wood stove this time of year (winter) and I didn't think that spraying paint was good for my health or fire insurance policy. I elected to delay that job until summer comes. I may also have the large pulley cover finished by then.
So you ask "What did you get out of all this work"?
The answer is not as simple as saying "I now have a nice, heavy duty, small shaper". I learned that it is nice to have kind friends. I learned a few things about being resourceful; this machine would have gone to scrap if I had to try to buy all the parts to repair it. The total cost of purchase and repair is somewhere in the vicinity of $600.00 CDN. Please don't ask about the number of hours spent!
I learned to "Leave the rose-colored glasses home" next time I go to look at a machine, and I now have a few clues about how a shaper works.
There is a certain pride in accomplishment when a project works out as planned (hoped for).
Now I can start planning some accessories to match my new machine.
Pete
Keep sending email with questions and interesting shaper stories.
My email address is KayPatFisher@gmail.com.