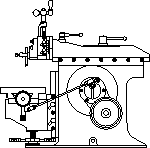

“I have fitted up a number of loose clappers successfully and I will set forth my method for those who may be interested.
“The taper pin is designed to be a tight (non-moving) fit on the mount sides and a loose (but shake-free) fit on the clapper. The nut on the end of the taper pin is 5/16"-18. There is an oil hole on top of the clapper that is usually overlooked. Every time you use your shaper you should put a few drops of oil in the oil hole, swing the clapper out and put a few drops of oil on both sides. It should swing free without any lift, shake or looseness.
“When the taper hole through the clapper wears oversize, or when the taper pin wears where it passes through the clapper, the obvious quick fix is to put a wrench on the nut and try to draw it in, making the clapper tighter. Do NOT do this! The pin is already tight on both sides of the mount. Reefing on the wrench handle usually breaks the nut off the end of the taper pin. If enough mayhem is indulged in, you may break part of the casting.
“The replacement taper pins will not tighten up a worn taper hole through the clapper. Besides a replacement taper pin, you will need a #8 taper pin reamer. These are reasonable from J&G. Actually, you may as well order a pair of Morse Taper reamers for your lathe's headstock and tailstock ram and spindle at the same time, if the sockets need a touchup. My reamers are imports from Spain and they work just fine.
“After removing the old taper pin, place the clapper back in alignment and carefully ream through the support and clapper. Take out minimal metal; you just want to clean up a worn taper hole through the clapper with the proper enlargement of the supports. Remove the reamer and clapper. Insert the reamer in the clapper and ream just a very slight amount; only enough for the clapper to move freely without shake when mounted. Tap the head of the taper pin lightly with a soft hammer to seat. Check clapper movement. It must move freely without shake. Tighten the nut in place. Do not reef on the nut; the taps with a hammer set the pin in place immovably. The nut is to keep the pin from backing out.
“Now, you have a clapper that will produce perfect cuts.
“If you can't obtain a replacement taper pin, buy a few #8 taper pins from your local screw and fastener supply. Bore a through hole in a short piece of 3/4" diameter drill rod. Insert the taper pin and tap in place with a soft hammer. Mount small end out in your lathe chuck. Turn the taper parallel with a carbide bit. Thread 5/16"-18 and cut off the excess. (Note that these taper pins come in various sizes; get the proper size for your needs.) You may want to change the position of the threads slightly.”
Thanks John for that great explanation.
Keep sending email with questions and interesting shaper stories.
My email address is KayPatFisher@gmail.com.